Step 1: Connecting the Sensor to Wi-Fi
1. Connect the Sensor to Power:
- Connect the sensor to a power source via a USB-C cable, ensuring that you are using a good quality wire that can deliver 5V.
- Wait a couple of minutes for the device to boot. You will see a blue light flashing at the back of the device.
2. Set Up Wi-Fi Access Point:
- The device will set up a Wi-Fi access point so you can connect to it and configure it to your home Wi-Fi.
- Go to your Wi-Fi settings on your phone and wait for the access point named **Senhus SD-1** to show up.
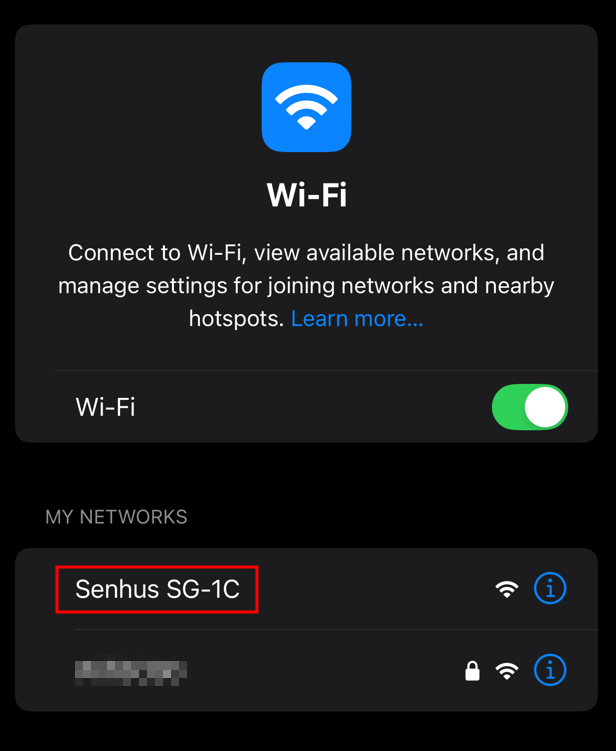
3. Connect to the Access Point:
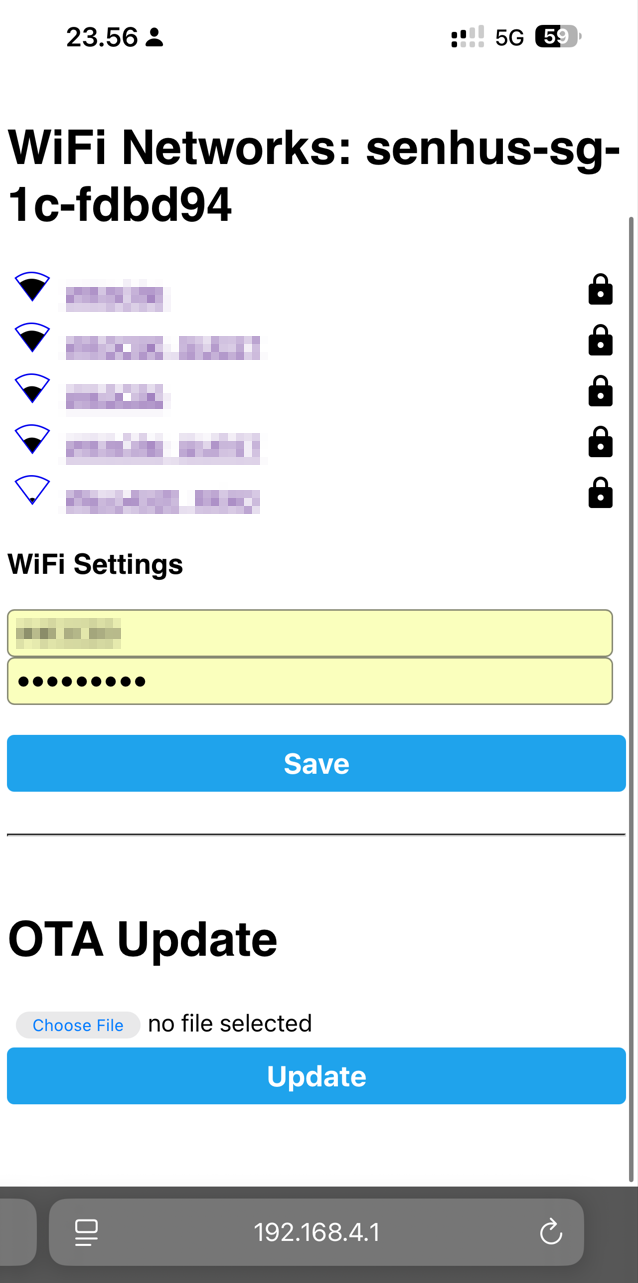
- Select the Senhus SD-1C access point and wait for a webpage to open automatically.
- If the webpage does not open automatically, navigate to [http://192.168.4.1](http://192.168.4.1).
4. Enter Your Home Wi-Fi Details:
- Select your home Wi-Fi network from the list and enter your password. If you cannot find your Wi-Fi name, enter the SSID manually.
- It will take a couple of minutes for the device to complete the setup.
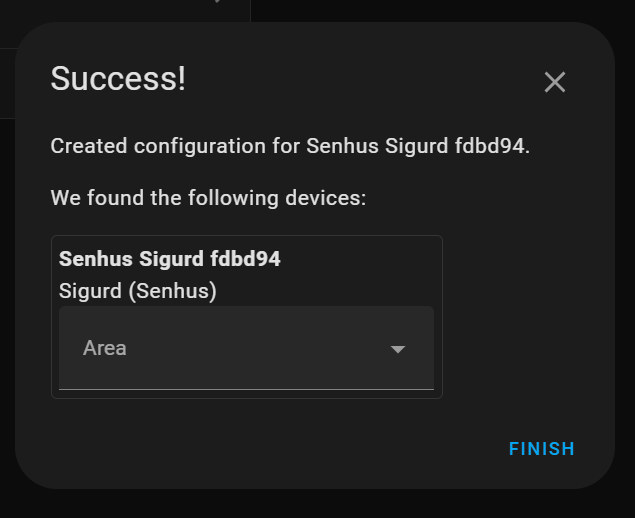
Step 2: Adding the Sensor to Home Assistant
1. Navigate to Home Assistant Devices Page
- Go to the Home Assistant Devices page. Home Assistant should automatically detect the device.
2. Add the Sensor:
- Select your home Wi-Fi network from the list and enter your password. If you cannot find your Wi-Fi name, enter the SSID manually.
- It will take a couple of minutes for the device to complete the setup.