
Connect the controller
- Check the heat-pump model and connector.
- Isolate all power supplies to the heat pump, including any separate backup-heater supply. Have a qualified installer open the electrical compartment and make the connection.
- Connect the supplied cable between the heat pump's CN-CNT socket and the Senhus controller. If the socket is occupied, contact Senhus before proceeding.
- Close any covers and restore power. Keep the controller's USB cable disconnected while CN-CNT is connected.
Where to find CN-CNT
On the WH-ADC0309K3E5AN, the control box is behind the upper front cover of the indoor unit. If there is no optional board, look for CN-CNT near the lower-right edge of the main PCB in the manual's board view. It sits below CN-CNT2, just above the CN6 terminal strip. If the CZ-NS5P optional PCB is fitted, use its CN-CNT socket, shown just inside the left terminal strip.
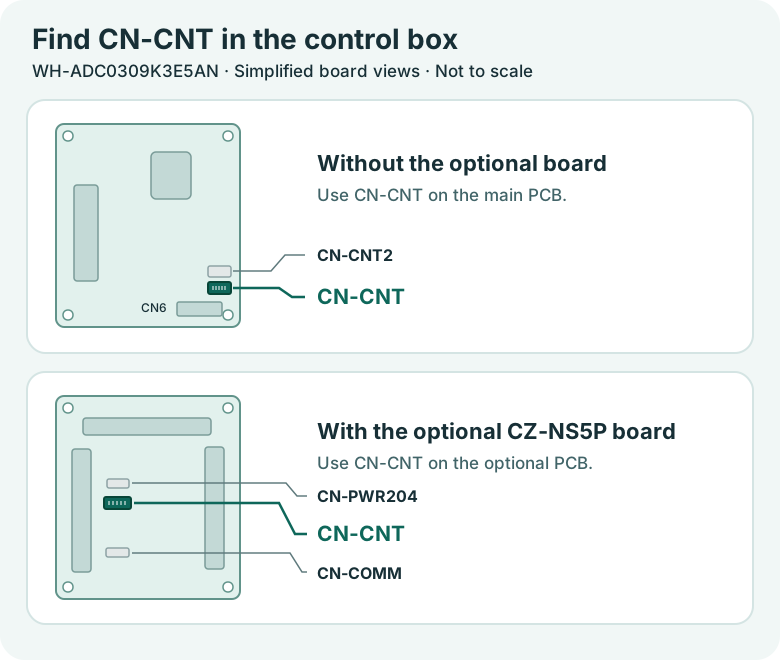
The board positions are specific to this K-series example. Use the manual for your exact model. Panasonic installation manual, page 20 · Panasonic service manual, board layouts on pages 90–91.
Set up Wi-Fi
- Wait up to a minute, then join the SenhusAquarea Wi-Fi network on your phone. The setup network has no password.
- If the setup page does not open automatically, visit http://192.168.4.1 while connected to that network.
- Select your 2.4 GHz home Wi-Fi and enter its password. After saving, reconnect your phone to your home Wi-Fi.
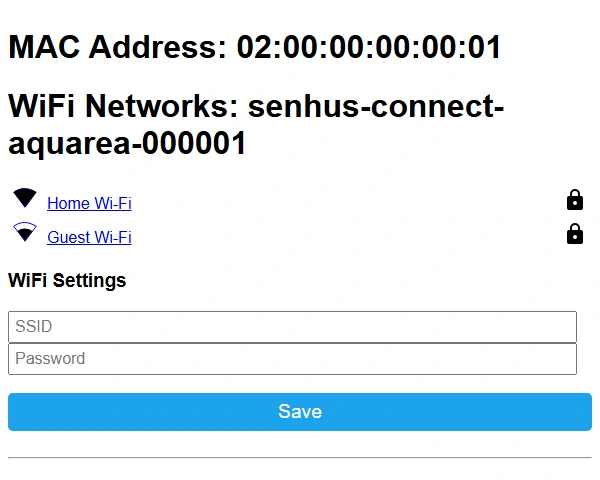
Wi-Fi setup screen with example network names.
Add Home Assistant
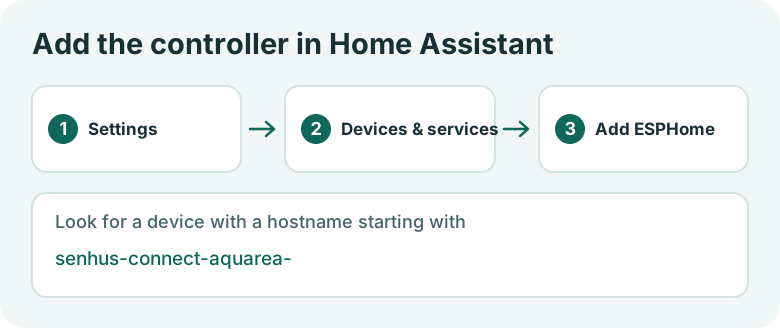
- Open Settings → Devices & services in Home Assistant. Add the discovered Senhus Connect Aquarea device under ESPHome. Its hostname starts with
senhus-connect-aquarea-. - If it isn't discovered, choose Add integration → ESPHome and enter the controller's IP address from your router. Leave the encryption key blank.
- Open the device and look for Heat Pump Link and the tank and water temperature readings.
You can also open http://<controller-IP> on your home network to view and change settings without a login. Use a trusted local network. See Configuration for the available settings.
